Skip to content

Automate, Protect, Optimize – IT Simplified

  • Home
  • Windows
    • ActiveDirectory
    • DNS
  • VMware
    • Automation
    • vSphere
    • Horizon
  • Proxmox
  • Checkpoint
  • CheckMK
  • Veeam
  • Azure
  • English (US)English (US)
  • SlovenčinaSlovenčina
  • Toggle search form
Veeam Backup and Replication Add Server button in Virtual Infrastructure

Veeam Backup add vCenter – complete guide

Posted on January 11, 2026 By Martin Hasin No Comments on Veeam Backup add vCenter – complete guide

Veeam Backup add vCenter is the first step for VMware backup. In this article, I will show how to add vCenter to Veeam Backup & Replication server step by step.

Veeam Backup add vCenter enables backing up virtual machines, replicating them, and creating disaster recovery plans.

Why add vCenter to Veeam Backup?

Adding a vCenter server to Veeam Backup & Replication is essential for:

  • VM Backup – backing up all virtual machines
  • Replication – replicating VMs to secondary storage
  • Instant Recovery – instant VM recovery
  • Granular Recovery – recovering individual files

More information in official Veeam documentation.

Veeam Backup add vCenter – procedure

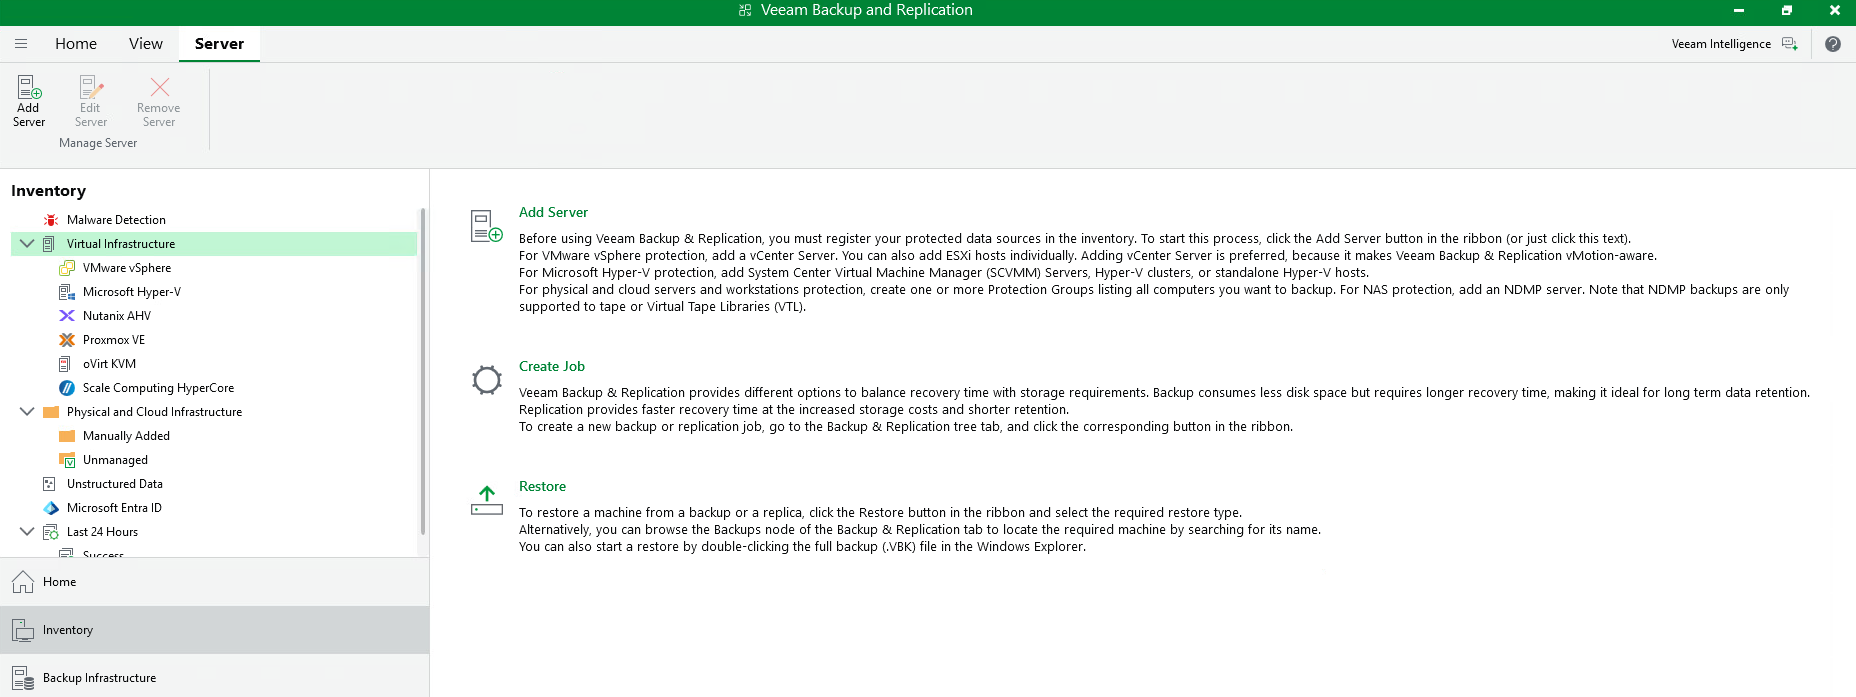
Step 1: Open Virtual Infrastructure

In Veeam Backup & Replication console, navigate to Virtual Infrastructure section and click the Add Server button.

Veeam Backup and Replication Add Server button in Virtual Infrastructure

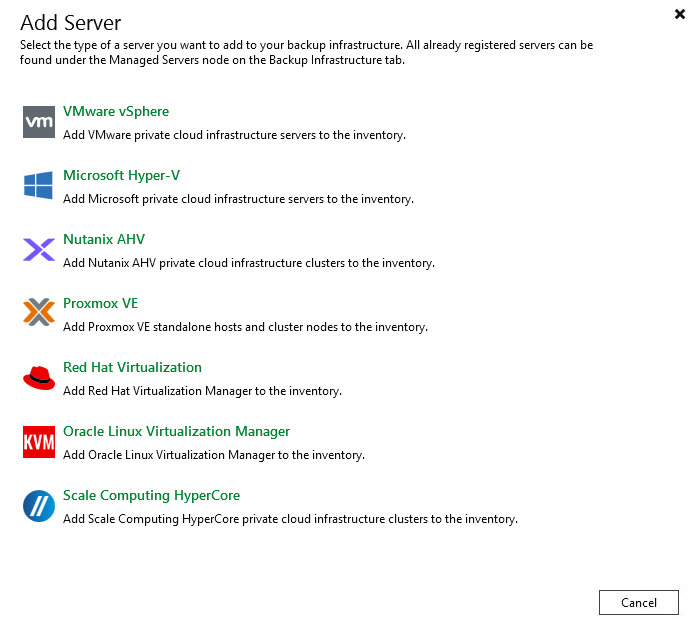
Step 2: Select server type

In the Add Server dialog, select VMware vSphere as the infrastructure type.

Veeam Backup Add Server dialog select VMware vSphere infrastructure

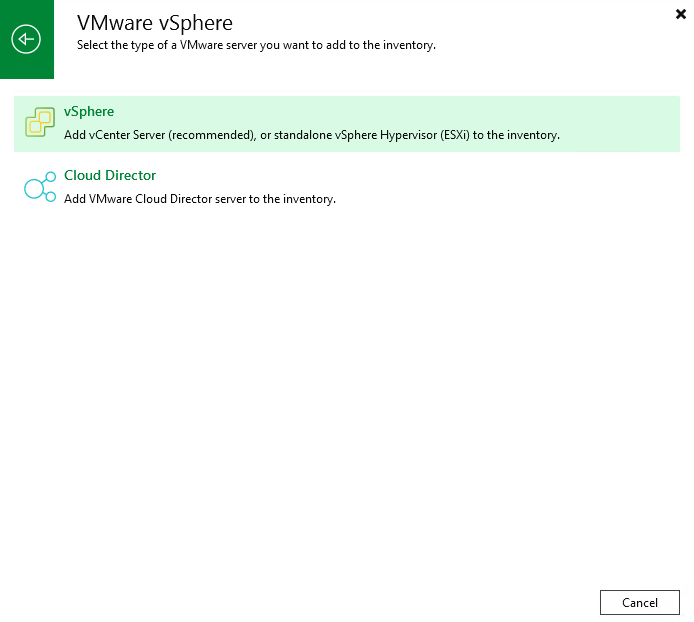
Step 3: Select vSphere

Select vSphere (not Cloud Director) to connect to vCenter server.

Veeam Backup select vSphere or VMware Cloud Director option

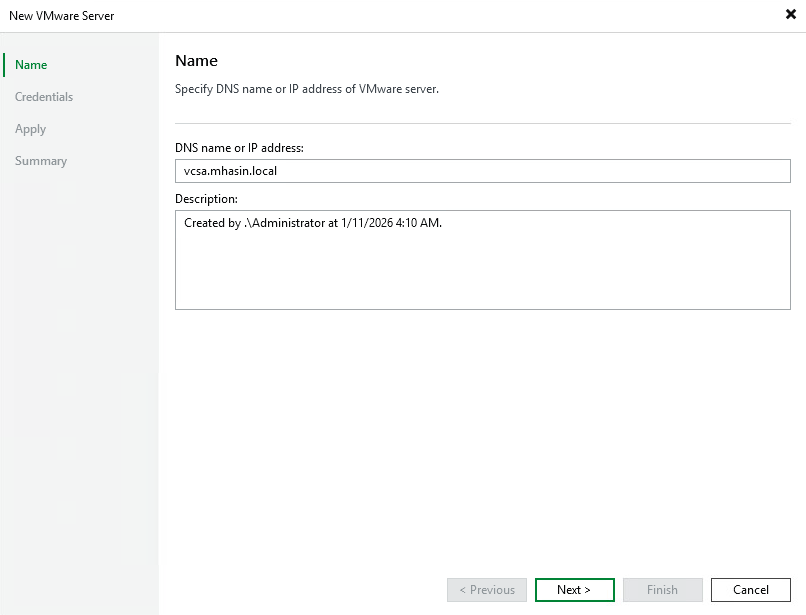
Step 4: Enter DNS name or IP address

In the Name step, enter the DNS name or IP address of your vCenter server. In my case, it’s vcsa.mhasin.local.

Veeam Backup New VMware Server wizard enter vCenter DNS name or IP address

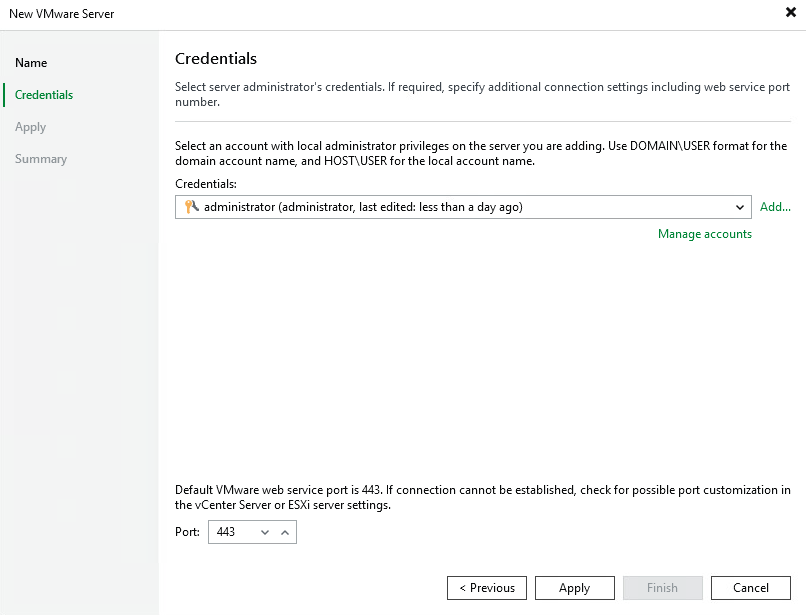
Step 5: Set credentials

In the Credentials step, select or add an account with administrator privileges on the vCenter server. The default port is 443.

Veeam Backup VMware Server credentials administrator account port 443

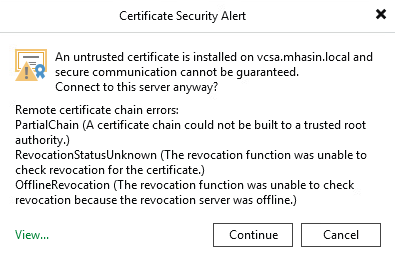
Step 6: Confirm certificate

If vCenter uses a self-signed certificate, a security warning will appear. Click Continue to proceed.

Veeam Backup certificate security alert untrusted vCenter SSL certificate

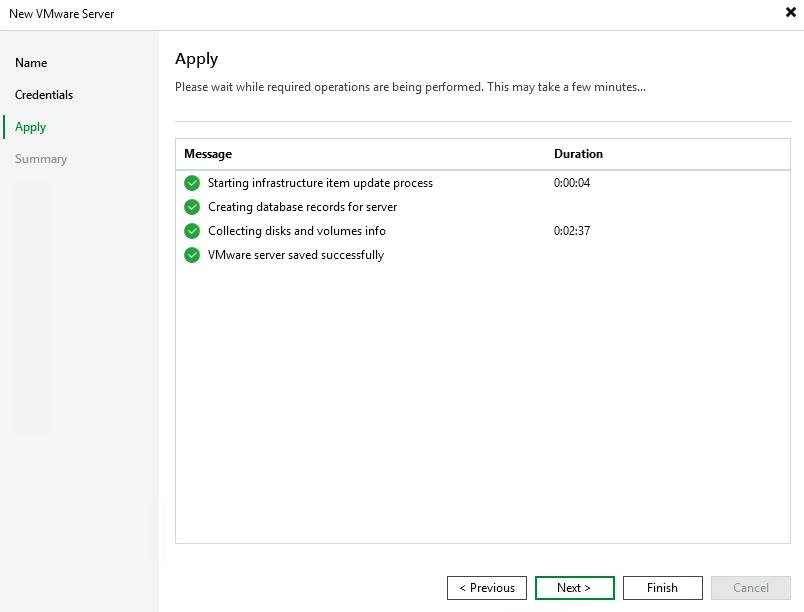
Step 7: Wait for completion

Veeam will connect to the vCenter server, create database records, and collect disk and volume information.
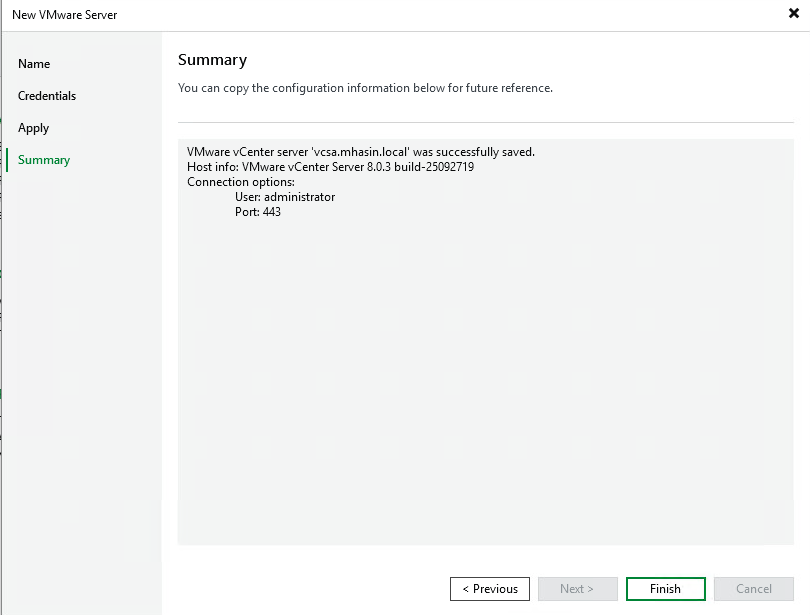
Veeam Backup VMware Server apply connecting creating database records

Step 8: Finish

After successful completion, a summary with information about the added vCenter server will be displayed. Click Finish.

Veeam Backup VMware vCenter Server successfully saved summary finish

Summary

Veeam Backup add vCenter is a simple 8-step process. After adding the vCenter server, you can start backing up your virtual machines.

More guides on VMware and Veeam in our sections.

Martin Hasin
CEO at mhite S.R.O. | martin.hasin@gmail.com | Website |  + postsBio

Odborník na kybernetickú bezpečnosť, správu Azure Cloud a VMware onprem. Využíva technológie, ako Checkmk a MRTG, na monitorovanie siete a zvyšovanie efektívnosti a bezpečnosti IT infraštruktúry. Kontakt: hasin(at)mhite.sk

  • Martin Hasin
    Cisco Nexus VPC Cluster for PROXMOX – Complete Guide
  • Martin Hasin
    Windows 11 in Azure with Entra ID – Complete Deployment Guide
  • Martin Hasin
    Azure SQL Access Verification – Complete Authentication Guide
  • Martin Hasin
    Veeam Backup Replication v13 Linux Appliance – Complete Guide
  • Martin Hasin
    Check Point VSX DHCP Relay – Configuration
  • Martin Hasin
    K3s on Raspberry Pi – From Idea to Functional Kubernetes Cluster
  • Martin Hasin
    MinIO S3 Backup with Veeam – Complete Guide
  • Martin Hasin
    Client Workstation Backup – Legislation and Practical Reasons
  • Martin Hasin
    MSSQL Transaction Logs – Disk Space Management
  • Martin Hasin
    Cisco UCS C220 M7 Monitoring and Logging Part 7
Veeam

Post navigation

Previous Post: Veeam Backup add vCenter – complete guide
Next Post: Veeam Backup add vCenter – complete guide

Leave a Reply Cancel reply

Your email address will not be published. Required fields are marked *

Search

Archives

  • January 2026
  • November 2025
  • October 2025
  • September 2025
  • August 2025
  • July 2025
  • May 2025
  • April 2025
  • March 2025
  • February 2025
  • January 2025
  • December 2024
  • November 2024
  • July 2024
  • June 2024
  • May 2024
  • March 2024
  • February 2024
  • January 2024
  • December 2023
  • June 2023
  • April 2023
  • November 2022
  • October 2022
  • August 2022
  • July 2022
  • March 2022
  • February 2022
  • January 2022
  • December 2021
  • November 2021
  • October 2021

Categories

  • ActiveDirectory
  • Automation
  • Azure
  • CheckMK
  • Checkpoint
  • DNS
  • Linux
  • Proxmox
  • Uncategorized
  • Veeam
  • VMware
  • vSphere
  • Windows

Archives

  • January 2026
  • November 2025
  • October 2025
  • September 2025
  • August 2025
  • July 2025
  • May 2025
  • April 2025
  • March 2025
  • February 2025
  • January 2025
  • December 2024
  • November 2024
  • July 2024
  • June 2024
  • May 2024
  • March 2024
  • February 2024
  • January 2024
  • December 2023
  • June 2023
  • April 2023
  • November 2022
  • October 2022
  • August 2022
  • July 2022
  • March 2022
  • February 2022
  • January 2022
  • December 2021
  • November 2021
  • October 2021

Copyright © 2021 Martin Hasin.

Powered by PressBook WordPress theme

Spravujte súhlas so súbormi cookie
Na poskytovanie tých najlepších skúseností používame technológie, ako sú súbory cookie na ukladanie a/alebo prístup k informáciám o zariadení. Súhlas s týmito technológiami nám umožní spracovávať údaje, ako je správanie pri prehliadaní alebo jedinečné ID na tejto stránke. Nesúhlas alebo odvolanie súhlasu môže nepriaznivo ovplyvniť určité vlastnosti a funkcie.
Funkčné Always active
Technické uloženie alebo prístup sú nevyhnutne potrebné na legitímny účel umožnenia použitia konkrétnej služby, ktorú si účastník alebo používateľ výslovne vyžiadal, alebo na jediný účel vykonania prenosu komunikácie cez elektronickú komunikačnú sieť.
Predvoľby
Technické uloženie alebo prístup je potrebný na legitímny účel ukladania preferencií, ktoré si účastník alebo používateľ nepožaduje.
Štatistiky
Technické úložisko alebo prístup, ktorý sa používa výlučne na štatistické účely. Technické úložisko alebo prístup, ktorý sa používa výlučne na anonymné štatistické účely. Bez predvolania, dobrovoľného plnenia zo strany vášho poskytovateľa internetových služieb alebo dodatočných záznamov od tretej strany, informácie uložené alebo získané len na tento účel sa zvyčajne nedajú použiť na vašu identifikáciu.
Marketing
Technické úložisko alebo prístup sú potrebné na vytvorenie používateľských profilov na odosielanie reklamy alebo sledovanie používateľa na webovej stránke alebo na viacerých webových stránkach na podobné marketingové účely.
  • Manage options
  • Manage services
  • Manage {vendor_count} vendors
  • Read more about these purposes
Zobraziť predvoľby
  • {title}
  • {title}
  • {title}