Veeam create backup job is the essential step for protecting your virtual machines. In this complete guide, I will show you how to create a backup job in Veeam Backup & Replication step by step with advanced settings.
Veeam create backup job wizard guides you through setting up VMware VM backup including virtual machine selection, storage repository, retention policy, and scheduling.
What is Veeam Backup Job and why do you need it?
Veeam Backup Job is an automated task that regularly backs up your virtual machines. A backup job defines:
- Which VMs to backup – selection of specific virtual machines or entire containers
- Where to store backups – backup repository with sufficient capacity
- How long to retain – retention policy for storage management
- When to backup – automatic scheduling
- Advanced options – compression, deduplication, CBT, encryption
More information in official Veeam documentation.
Veeam Create Backup Job – complete procedure
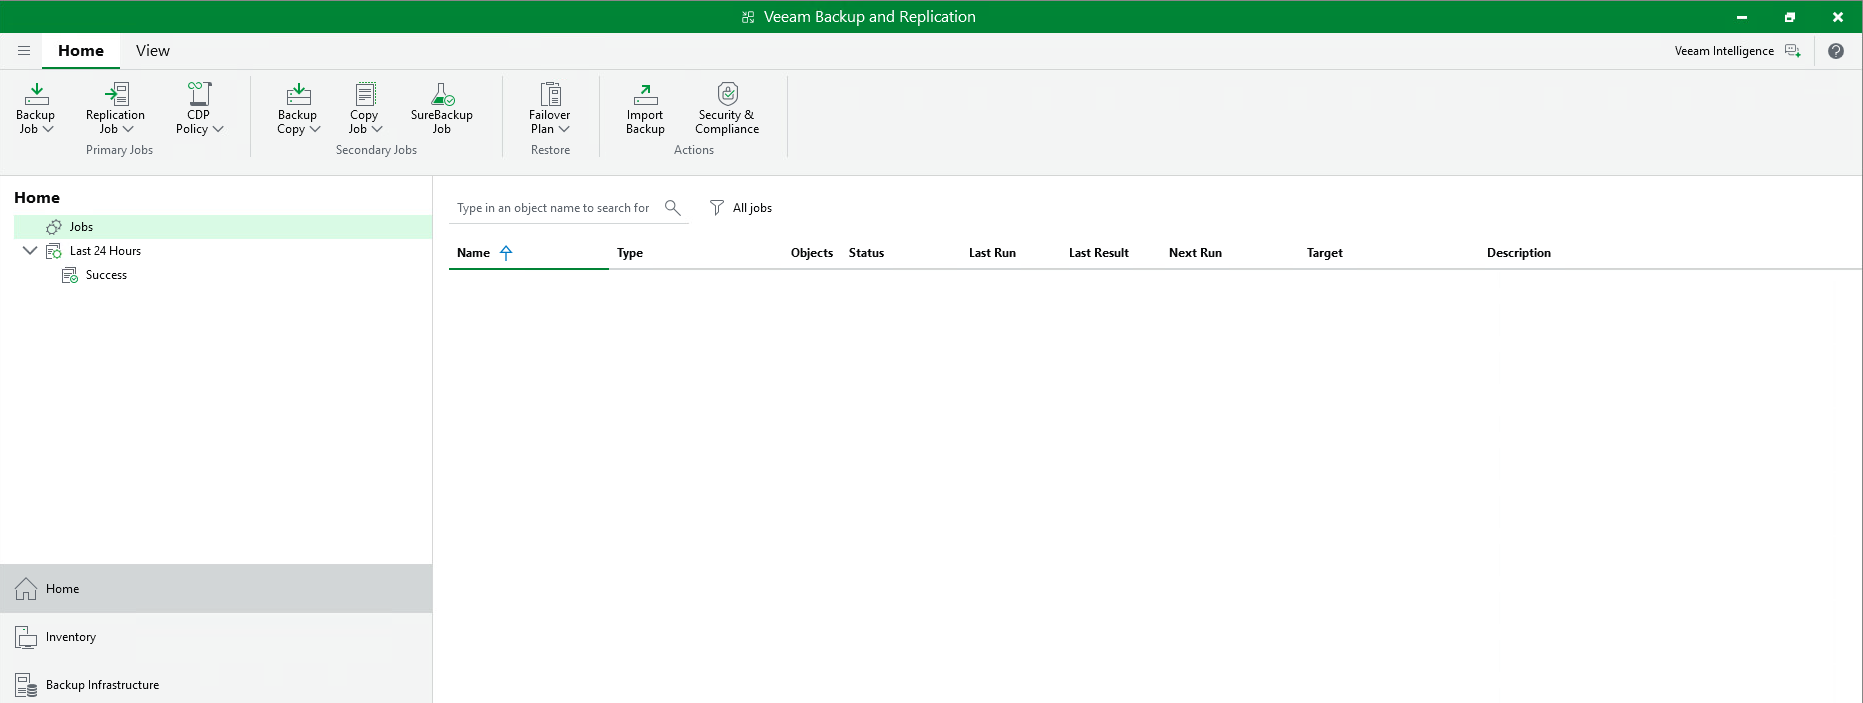
Step 1: Open Veeam console and start Backup Job wizard
In Veeam Backup & Replication console, navigate to Home section and click Backup Job in the top menu.
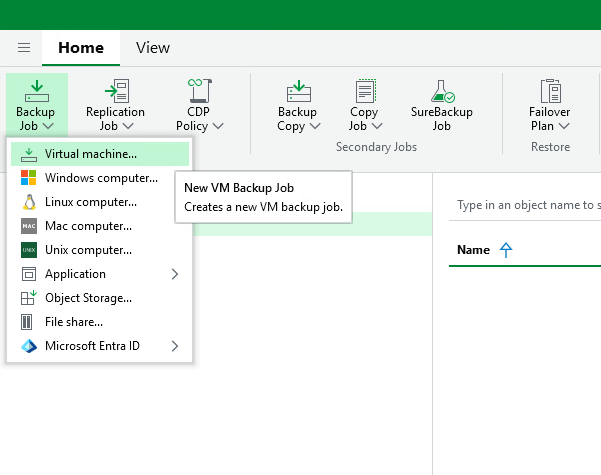
Step 2: Select backup type – Virtual machine
From the dropdown menu, select Virtual machine to create VMware virtual machine backup.
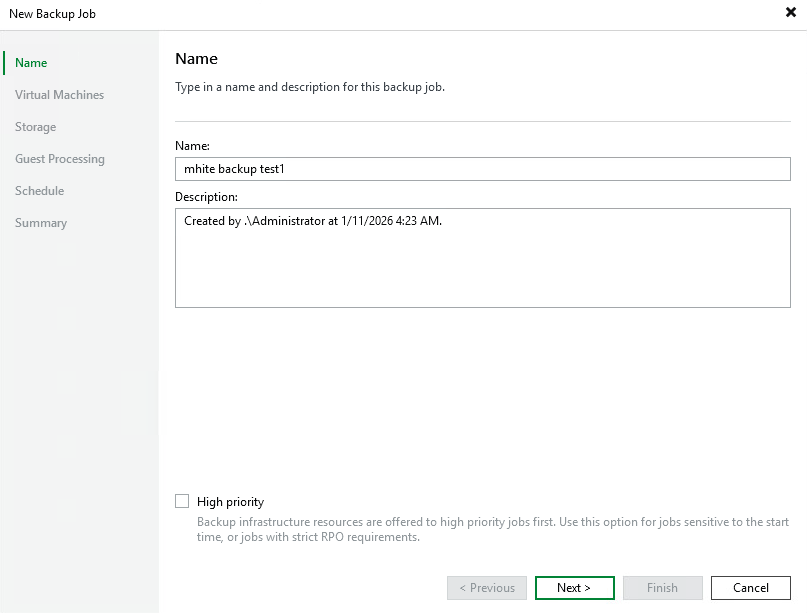
Step 3: Enter backup job name
In the Name step, enter a descriptive name for your backup job. Optionally set High priority for critical workloads.
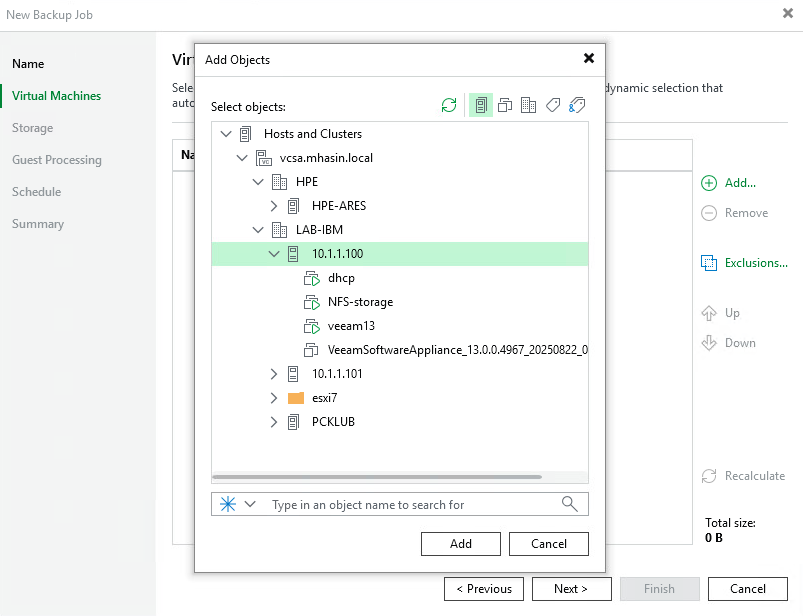
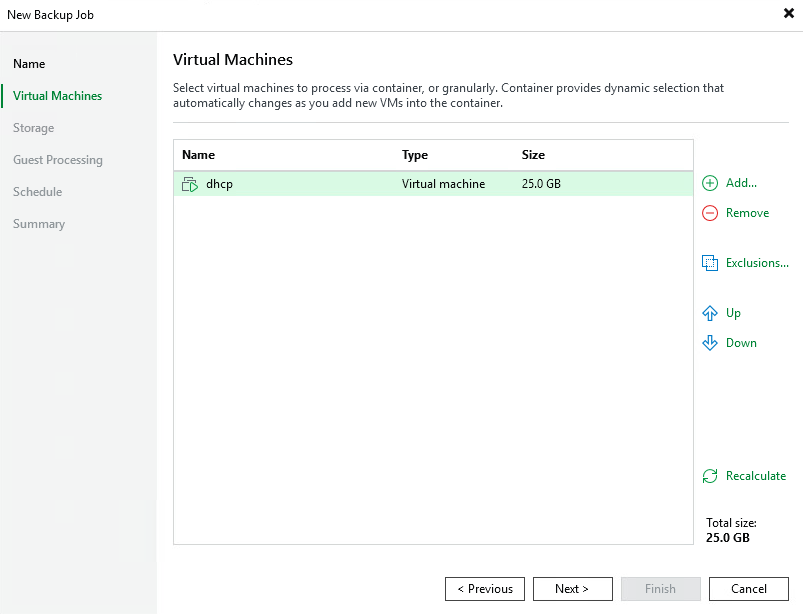
Step 4: Add virtual machines for backup
Click Add and select VMs from the vCenter hierarchy. You can select individual VMs, hosts, or entire clusters.
Step 5: Review selected virtual machines
Verify the list of selected VMs and their size. You can add more or remove unnecessary ones.
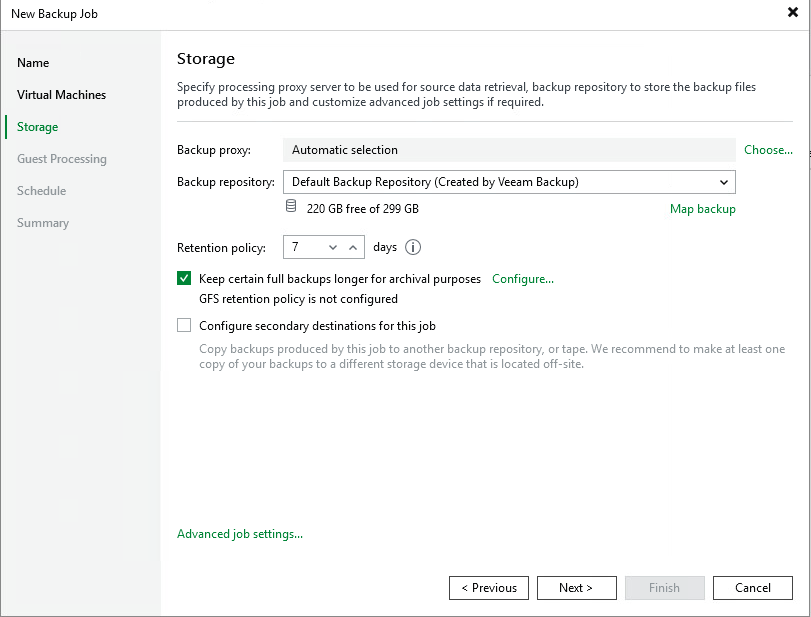
Veeam Backup Job Storage settings
Step 6: Configure Storage and Retention Policy
Select Backup repository and set Retention policy. Recommended value is at least 7 days for basic protection.
Veeam Advanced Settings – detailed description
Step 7: Advanced Settings – Maintenance (Health Check and Remove Deleted Items)
In Advanced job settings on the Maintenance tab, you’ll find critical settings for backup integrity and maintenance.
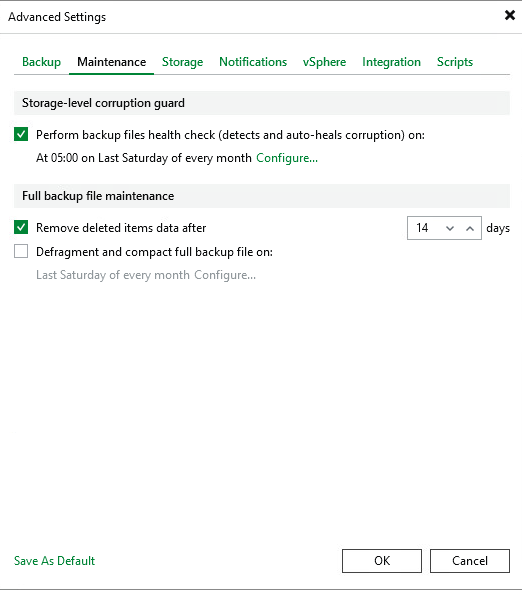
Health Check – backup integrity verification
Perform backup files health check is an automatic backup file integrity verification. This feature:
- Detects corrupted blocks – Veeam reads all data blocks in the backup and verifies their CRC checksum
- Automatically repairs – If it finds a corrupted block, it automatically replaces it with correct data from the source VM
- Prevents recovery issues – Better to discover problems during verification than during critical recovery
- Recommended monthly execution – For example, last Saturday of each month when load is lower
Why is Health Check important? Backup files can become corrupted due to storage problems (bad sectors, bit rot), network errors during backup, or RAM issues. Without regular verification, you would discover problems only during recovery attempt – which may be too late.
Remove deleted items data after X days
Remove deleted items data after 14 days determines how long Veeam keeps data of deleted VMs in backup. This feature:
- Saves storage – If you remove a VM from backup job or delete the VM, its data is automatically removed after 14 days
- Provides safety buffer – You have 14 days to recover accidentally deleted VM
- Keeps backups clean – Data from VMs you no longer need doesn’t accumulate
Step 8: Advanced Settings – Storage (Extreme compression and deduplication)
The Storage tab contains settings for storage and performance optimization.
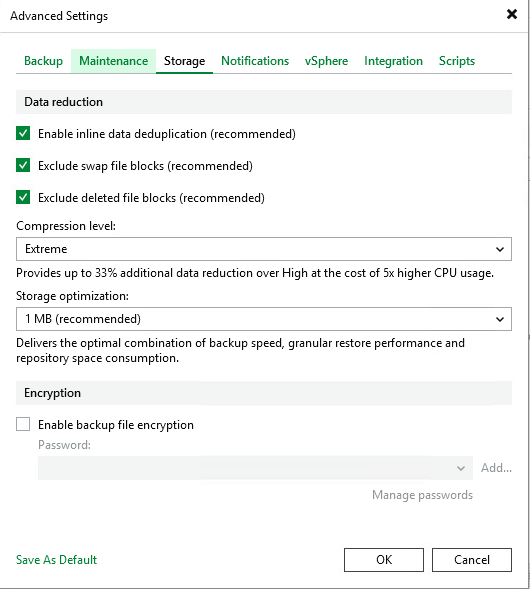
Inline Data Deduplication
Enable inline data deduplication eliminates duplicate data blocks during backup:
- 40-60% storage savings – Typical savings for VMs with similar OS and applications
- Real-time processing – Deduplication occurs during backup, not afterwards
- Recommended to always enable – Minimal performance impact, significant space savings
Exclude swap file blocks and deleted file blocks
- Exclude swap file blocks – Skips swap/pagefile content not needed for recovery (saves 4-16 GB per VM)
- Exclude deleted file blocks – Skips blocks marked as deleted in the file system
Compression Level: Extreme
Extreme compression provides the highest compression level:
- Up to 33% better compression – Compared to High level
- 5x higher CPU load – Requires more computing power on backup proxy
- Ideal for slow WAN links – Smaller data volume = faster transfer
- Suitable with powerful backup proxy – With sufficient CPU cores
When to use Extreme compression?
- Backing up over slow network connection
- Limited backup repository capacity
- Backup proxy with powerful CPUs (8+ cores)
- Backing up off-peak when CPU is available
Step 9: Advanced Settings – vSphere (VMware Tools Quiescence and CBT)
The vSphere tab contains VMware-specific settings for consistent backups.
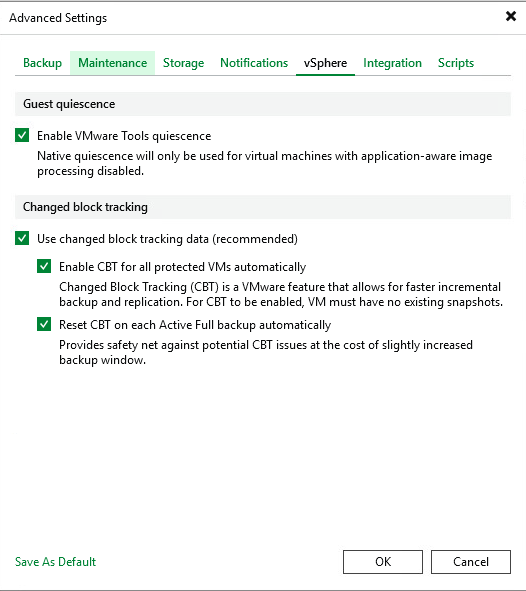
VMware Tools Quiescence
Enable VMware Tools quiescence ensures consistent VM state before snapshot creation:
- Flushes I/O operations – Writes all pending data from memory to disk
- Freezes file system – Temporarily pauses disk writes
- VSS (Windows) – Triggers Volume Shadow Copy for application consistency
- Sync (Linux) – Invokes sync to write buffers to disk
Why is Quiescence important? Without quiescence, a snapshot might capture VM in an inconsistent state – for example, in the middle of writing to a database. After recovery, the database could be corrupted. With quiescence, the backup is always in a consistent, recoverable state.
Changed Block Tracking (CBT)
Enable CBT for all protected VMs automatically activates VMware feature for tracking changed blocks:
- Dramatically faster incremental backups – Instead of reading the entire disk, Veeam backs up only changed blocks
- Typically 95-99% time savings – 1TB VM with 10GB changes = only 10GB is backed up
- Automatic activation – Veeam enables CBT on VM during first backup
- Reset CBT on Active Full – Resets CBT tracking to eliminate potential errors
Step 10: Advanced Settings – Integration (Backup from Storage Snapshots)
The Integration tab enables integration with enterprise storage systems.
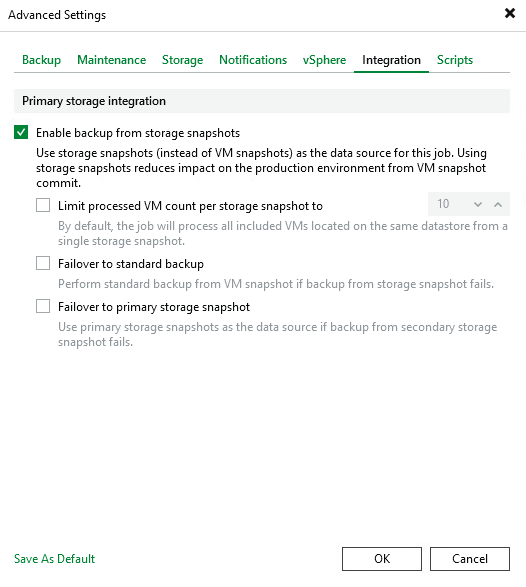
Enable backup from storage snapshots
Backup from storage snapshots uses snapshots directly from storage array instead of VMware snapshots:
- Minimal production impact – Storage snapshot is instant (milliseconds), while VMware snapshot loads ESXi host
- Eliminates VMware snapshot stun – VM is not slowed during snapshot creation
- Support for HPE, Dell EMC, NetApp, Pure Storage – And other enterprise storage systems
- Offloaded data transfer – Data is read directly from storage, not through ESXi
When to use Storage Snapshots?
- You have supported enterprise storage (HPE 3PAR/Primera/Alletra, Dell PowerStore, NetApp ONTAP, Pure Storage)
- Backing up large VMs with intensive I/O
- Need to minimize impact on production workloads
- Having problems with VMware snapshot consolidation
Veeam Backup Job Guest Processing – detailed description
Step 11: Guest Processing settings
Guest Processing allows Veeam to interact with the operating system inside VM for advanced features.
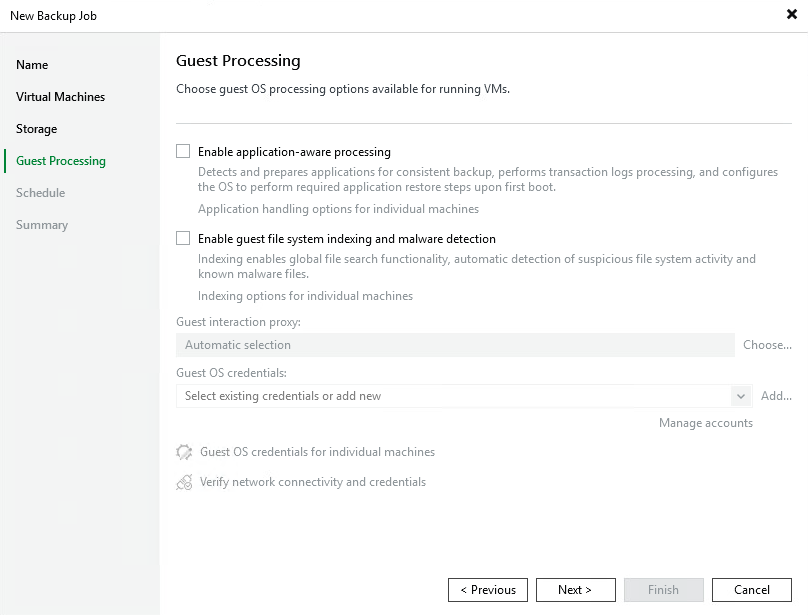
Application-aware processing
Enable application-aware processing ensures application-consistent backups:
- Microsoft SQL Server – Truncates transaction logs after successful backup, ensures consistent database
- Microsoft Exchange – Consistent mailbox database state, log truncation
- Oracle Database – RMAN integration for consistent Oracle DB backups
- PostgreSQL/MySQL – Consistent open-source database backups
- Active Directory – Consistent AD database state (NTDS.dit)
- SharePoint – Consistent SharePoint farm backups
How does it work?
- Veeam connects to VM via VMware Tools or directly (agent)
- Invokes VSS (Volume Shadow Copy Service) on Windows
- VSS notifies applications (SQL, Exchange) that backup is coming
- Applications write all data from memory and prepare
- Snapshot is created in consistent state
- After backup, transaction logs are truncated
Guest file system indexing and malware detection
Enable guest file system indexing creates file index in backup:
- Fast file search – Find specific file in backup without restoring entire VM
- Enterprise Manager search – Search across all backups
- 1-Click File Restore – Instant individual file recovery from web interface
Malware detection scans backups for malware presence:
- Inline scan – Malware detection during backup
- YARA rules – Support for custom detection rules
- Antivirus integration – Integration with existing AV solutions
- Secure restore – Scanning before recovery to prevent re-infection
Guest OS credentials
For Guest Processing, you need to provide login credentials for VM:
- Windows – Account with administrator privileges (local admin or domain account)
- Linux – Root account or account with sudo privileges
- Stored in Credential Manager – Secure password storage in Veeam
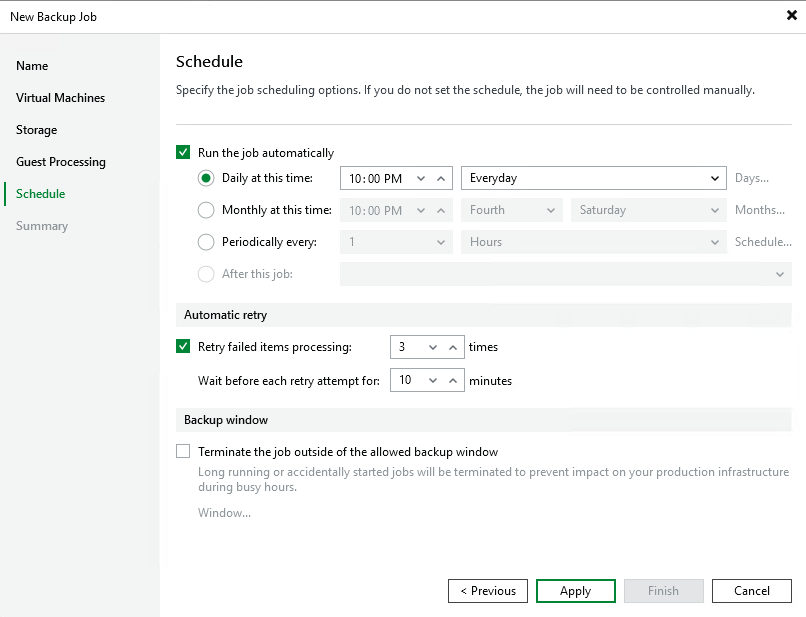
Veeam Backup Job Schedule and completion
Step 12: Set backup schedule
Configure automatic execution. Most common is daily at 10:00 PM outside business hours.
Step 13: Finish and Summary
Review the configuration summary. Veeam also displays PowerShell cmdlet for automation.
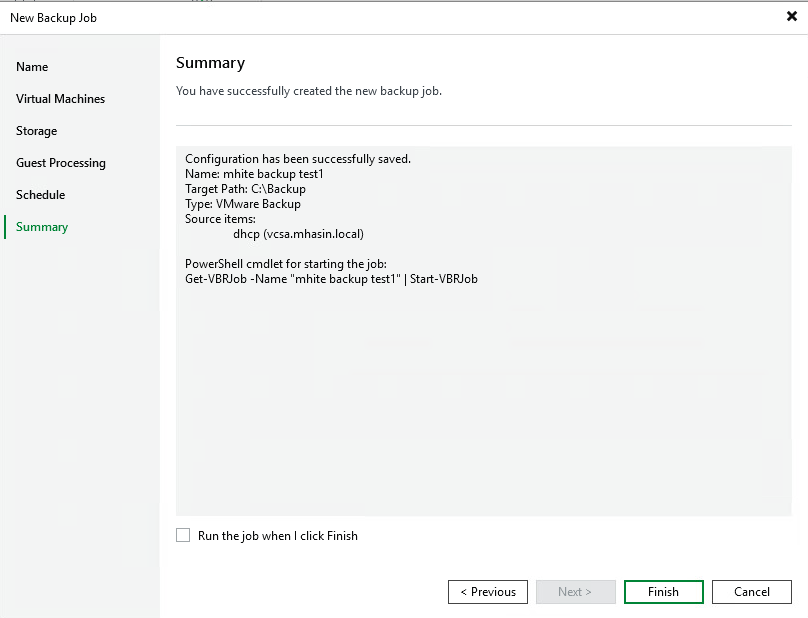
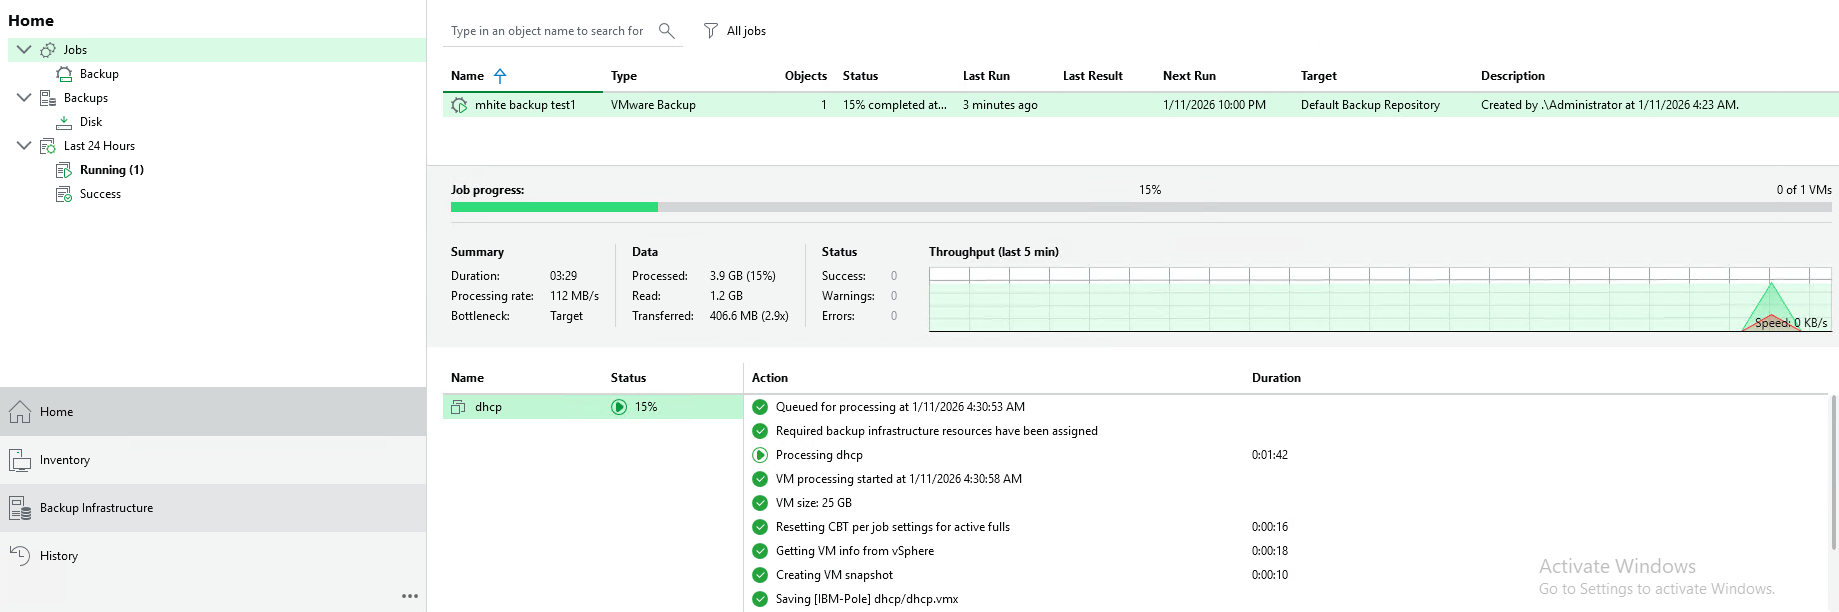
Step 14: Run and monitor backup job
After clicking Finish, you can start the backup job. Monitor backup progress in real-time in the console.
Frequently Asked Questions (FAQ)
How long does it take to create a Veeam backup job?
Creating a backup job takes approximately 5-10 minutes. The actual backup depends on VM size and storage speed – typically 50-200 MB/s.
What is the recommended retention policy?
For production environments, we recommend at least 14 days. For critical systems, use GFS (Grandfather-Father-Son) scheme with monthly and yearly backups.
What is Changed Block Tracking (CBT)?
CBT is a VMware technology that tracks changed disk blocks. Veeam uses CBT for faster incremental backups – backing up only changed data, which can be just 1-5% of total disk size.
Can I backup VMs during operation?
Yes, Veeam uses VMware snapshots for backup without downtime. With VMware Tools quiescence, you also get application-consistent backups without needing to shut down the VM.
Why do I need Application-aware processing?
Without application-aware processing, databases may be in an inconsistent state. SQL Server, Exchange, or Oracle require proper transaction completion before backup. Application-aware processing ensures this automatically.
What happens if backup fails?
Veeam automatically retries backup according to Automatic retry settings (standard 3 attempts with 10-minute interval). If all attempts fail, you receive notification and the job is marked as Failed.
Summary
Veeam create backup job is a 14-step process that ensures reliable backup of your VMware virtual machines. Key settings include:
- Health Check – monthly backup integrity verification
- Extreme compression – maximum storage savings
- VMware Tools Quiescence – consistent VM state
- CBT – fast incremental backups
- Storage Snapshots – minimal production impact
- Application-aware processing – consistent databases
More guides on VMware and Veeam in our sections.

Odborník na kybernetickú bezpečnosť, správu Azure Cloud a VMware onprem. Využíva technológie, ako Checkmk a MRTG, na monitorovanie siete a zvyšovanie efektívnosti a bezpečnosti IT infraštruktúry. Kontakt: hasin(at)mhite.sk