Veeam Restore VM is a critical function for recovering virtual machines from backup. In this complete guide, I will show you how to restore VM in Veeam Backup & Replication step by step including all recovery options.
Veeam Restore VM supports various recovery modes – to original location, to new location, or staged restore for testing before production deployment.
VM Recovery Types in Veeam Backup & Replication
Veeam offers several types of virtual machine recovery:
- Restore entire VM – complete recovery of entire virtual machine
- Instant Recovery – instantly run VM directly from backup
- Instant Disk Recovery – recover individual disks
- Restore VM files – recover configuration files (.vmx, .vmdk)
- Guest files from backup – recover individual files from VM
More information in official Veeam documentation.
Veeam Restore VM – complete recovery procedure
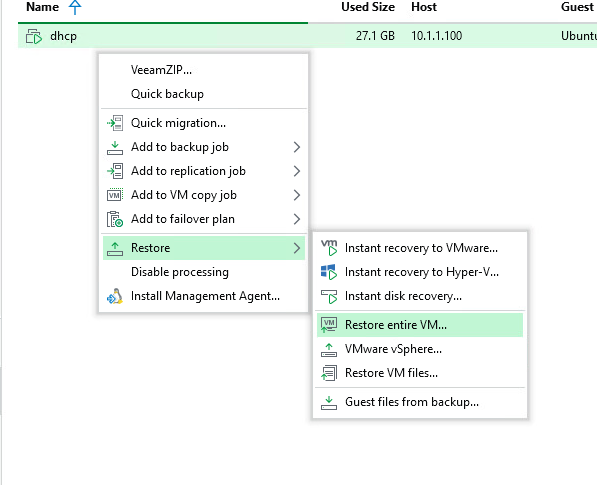
Step 1: Select VM in Inventory
In Veeam Backup & Replication console, navigate to Inventory section and select the virtual machine you want to restore. You can also see the Malware Status indicator.

Step 2: Start recovery via context menu
Right-click on the VM and select Restore → Restore entire VM. You also have other options like Instant Recovery or individual file recovery.
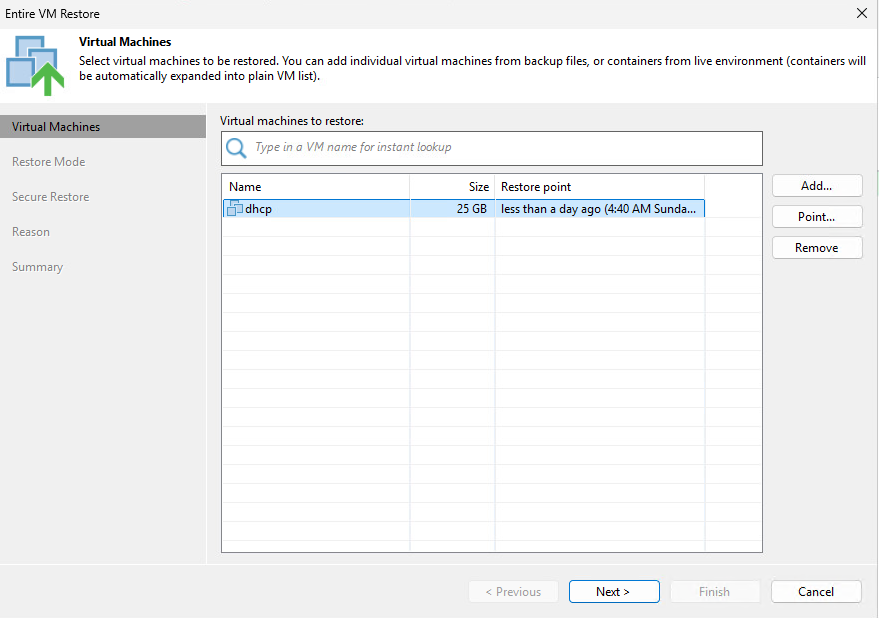
Step 3: Select VM and restore point
In the Entire VM Restore wizard, select the virtual machine and desired restore point. Click Point to select a specific point in time.
Veeam Restore VM – Restore Mode
Step 4: Select restore mode
In the Restore Mode step, you have three main options:
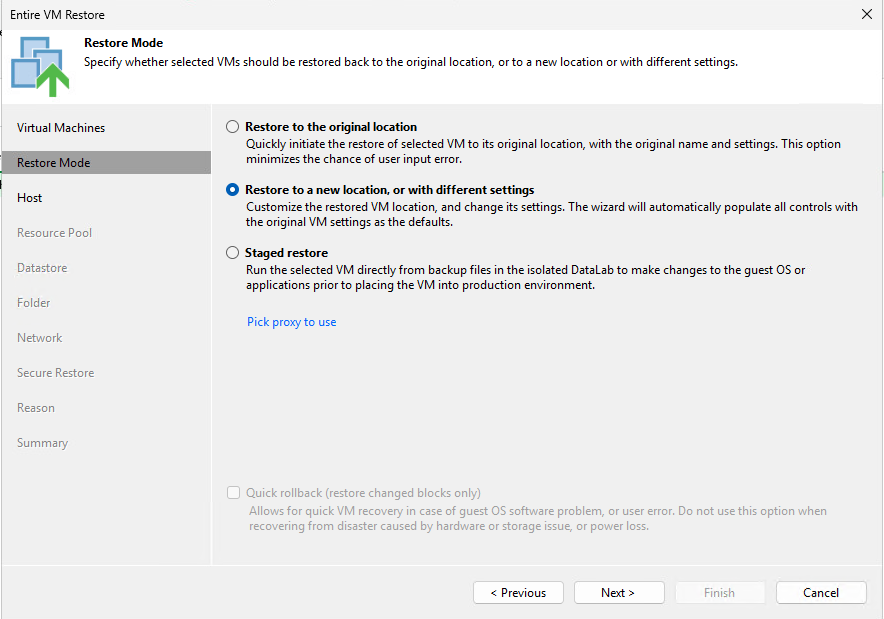
Restore to the original location
- Restores VM to original location with original settings
- Fastest option – minimal configuration
- Warning: Overwrites existing VM if it exists
Restore to a new location, or with different settings
- Allows changing host, datastore, network, VM name
- Ideal for recovery to different environment
- Option to keep original VM and create a copy
Staged restore
- Runs VM in isolated DataLab environment
- Allows testing and modifications before production deployment
- Ideal for integrity verification before recovery
Quick rollback
- Restores only changed blocks
- Extremely fast recovery for software problems
- Do not use for hardware/storage issues
Veeam Restore VM – target location configuration
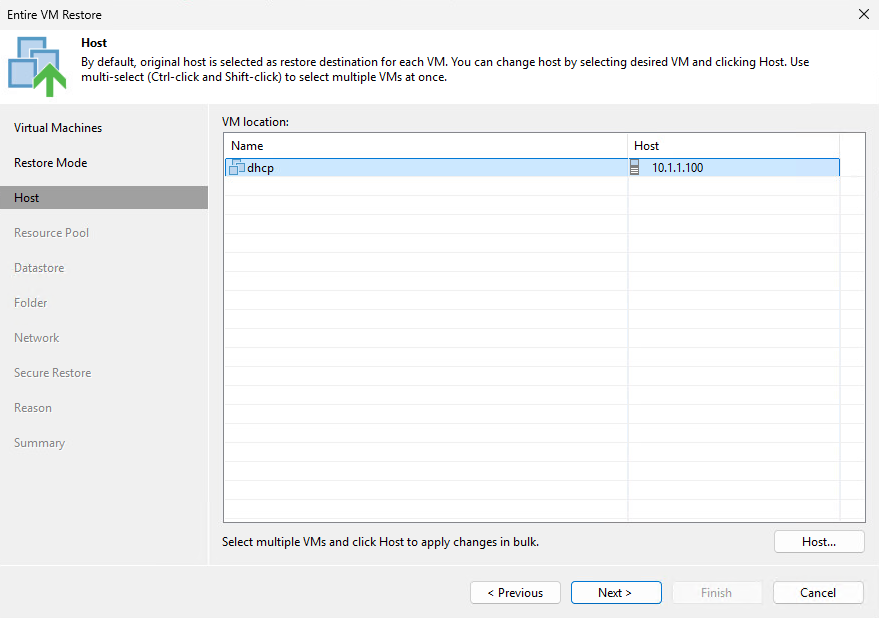
Step 5: Select target ESXi host
If you selected restore to new location, select the target ESXi host for the restored VM.
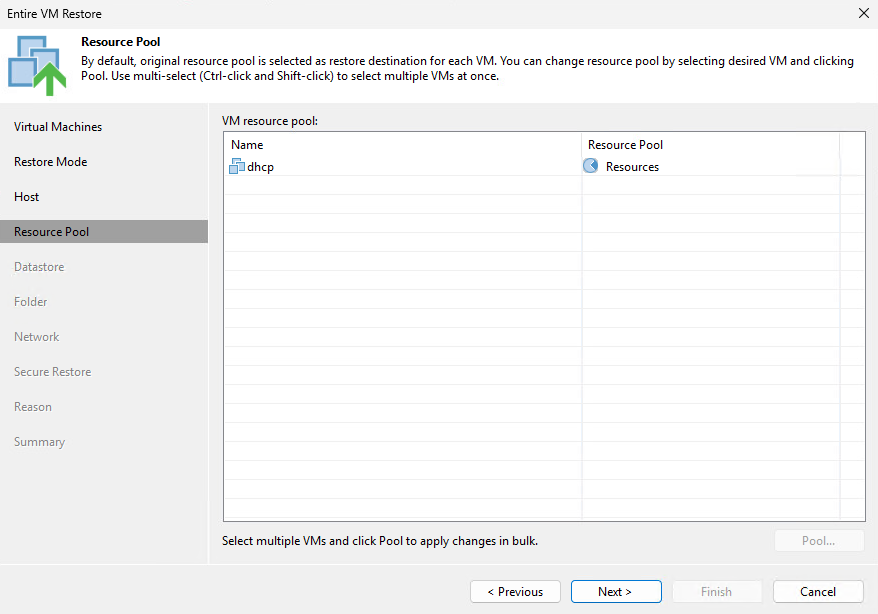
Step 6: Select Resource Pool
Select Resource Pool for the restored VM. By default, the original resource pool is used.
Step 7: Select Datastore and disk type
Select target Datastore and disk type:
- Same as source – preserves original type (thin/thick)
- Thin – space saving, allocates gradually
- Thick – all space allocated immediately

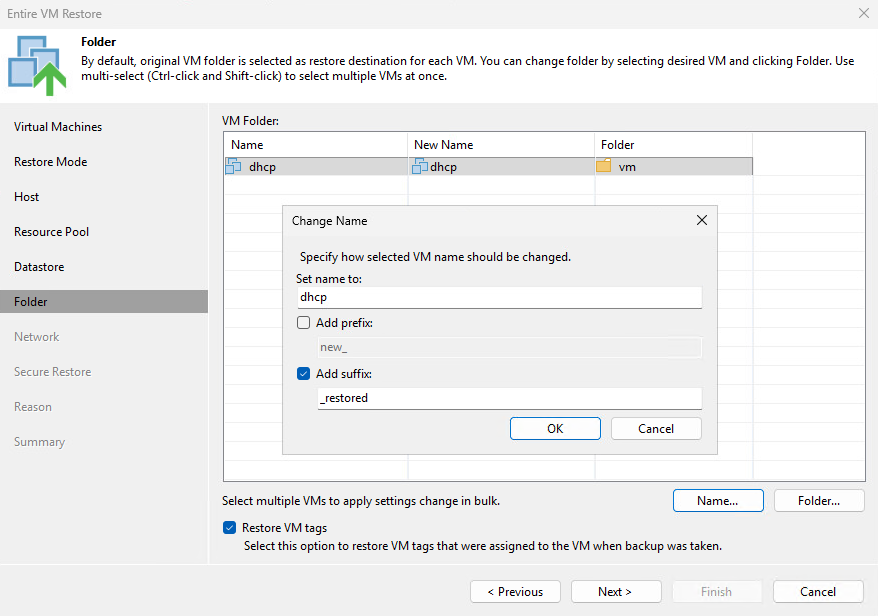
Step 8: Set VM name and folder
You can change the restored VM name by adding prefix or suffix (e.g., “_restored”). This prevents name conflicts if original VM still exists.
Step 9: Configure network mapping
Map source networks to target networks. If restoring to different environment, you will likely need to change network connections.

Veeam Restore VM – Secure Restore
Step 10: Configure malware scanning
Secure Restore scans the backup before recovery for malware detection:

Veeam Threat Hunter
- Built-in antivirus from Veeam
- Scans backup before recovery
- Detects known malware signatures
YARA Rules
- Support for custom YARA rules
- Ability to define custom detection rules
- For advanced threat detection
Scan options – what to do if malware is found
- Proceed with recovery but disable network adapters – Restores VM but without network (for analysis)
- Abort VM recovery – Cancels recovery completely
- Continue scanning all remaining files – Continues scanning for complete report
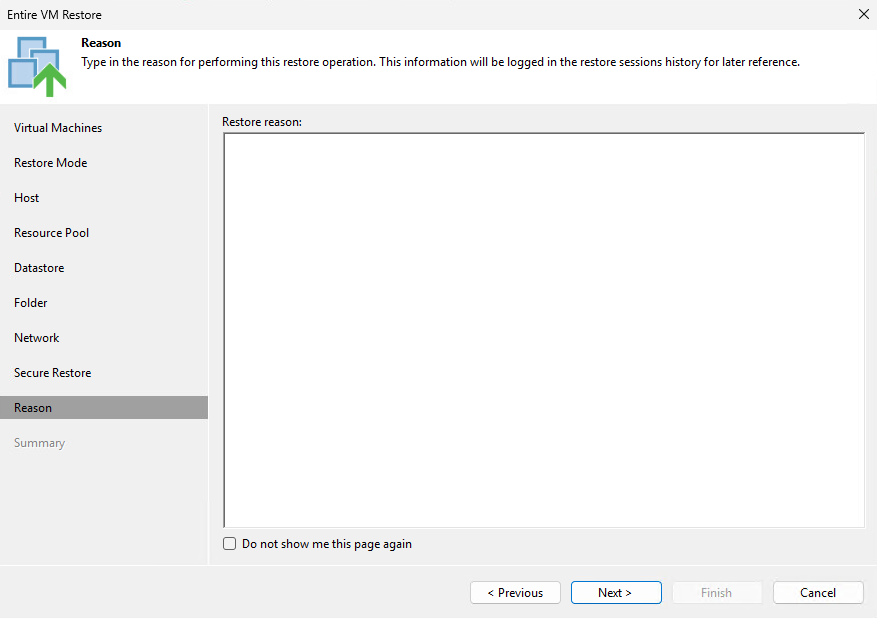
Step 11: Enter restore reason (audit)
For audit and compliance, enter the restore reason. This is logged for later reference.
Veeam Restore VM – completion and monitoring
Step 12: Review Summary and start recovery
Review all settings in Summary. Optionally check Power on target VM after restoring for automatic VM startup.

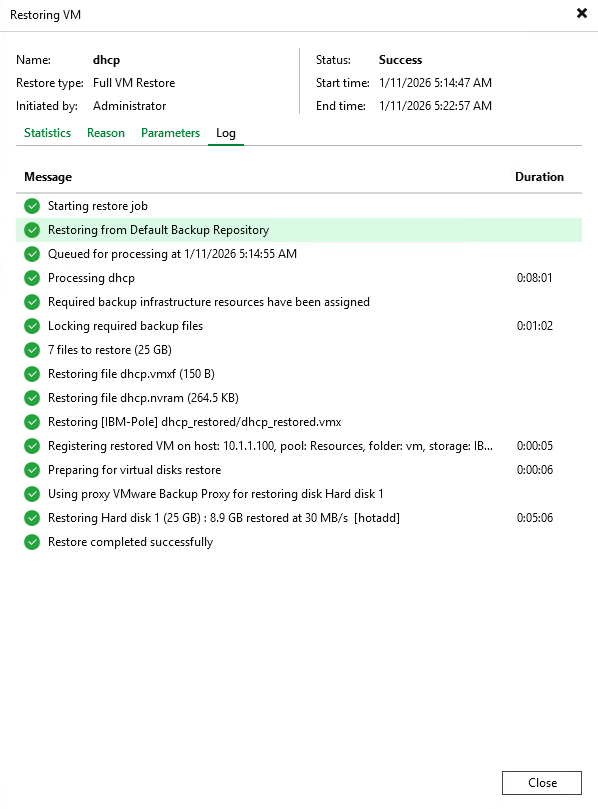
Step 13: Monitor recovery progress
After clicking Finish, recovery starts. You can monitor detailed progress including:
- Restoring backup files
- Creating VM on target host
- Restoring virtual disks (hotadd transport)
- Recovery speed (typically 30-100 MB/s)
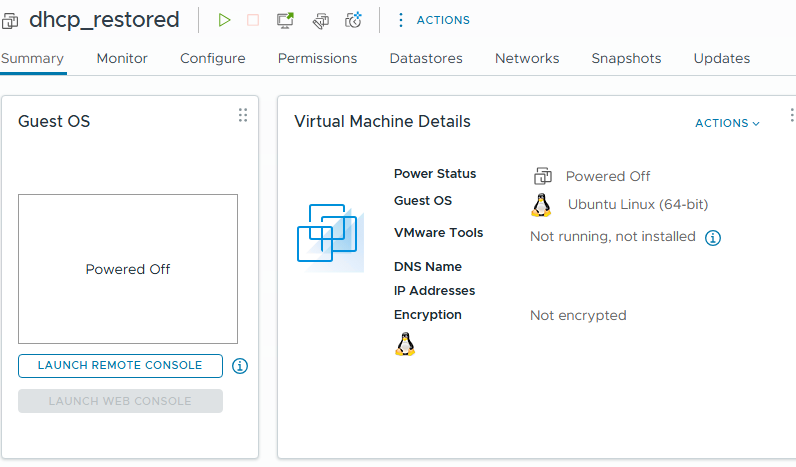
Step 14: Verify restored VM in vCenter
After successful recovery, you will find the VM in vCenter. In this example, the VM was restored as “dhcp_restored”.
Frequently Asked Questions (FAQ)
How long does VM recovery take in Veeam?
Recovery time depends on VM size and infrastructure speed. Typically a 25 GB VM recovers in 5-10 minutes at 30-50 MB/s speed. For larger VMs, use Instant Recovery for immediate access.
Can I restore VM to different host/datastore?
Yes, select “Restore to a new location” and configure target host, datastore, network, and VM name as needed.
What is Instant Recovery vs Full VM Restore?
Instant Recovery runs VM directly from backup within seconds. Full VM Restore completely copies all data to production storage, which takes longer but VM runs at full performance.
What if backup contains malware?
Use Secure Restore with Veeam Threat Hunter for scanning before recovery. If malware is found, you can restore VM with disabled network for safe analysis.
Can I restore VM if original is still running?
Yes, use “Restore to new location” and add suffix like “_restored” to the name. VM will be restored alongside original without conflict.
What is Quick Rollback?
Quick Rollback restores only changed blocks since backup. It’s extremely fast (seconds to minutes), but use it only for software problems, not hardware or storage failures.
Summary
Veeam Restore VM is a 14-step process that enables reliable recovery of VMware virtual machines. Key features include:
- Flexible Restore Modes – recovery to original or new location
- Staged Restore – testing in isolated environment
- Secure Restore – malware scanning before recovery
- Quick Rollback – fast recovery of changed blocks
- Audit Logging – recording restore reasons
- Network Mapping – flexible network mapping
More guides on VMware and Veeam in our sections.

Odborník na kybernetickú bezpečnosť, správu Azure Cloud a VMware onprem. Využíva technológie, ako Checkmk a MRTG, na monitorovanie siete a zvyšovanie efektívnosti a bezpečnosti IT infraštruktúry. Kontakt: hasin(at)mhite.sk